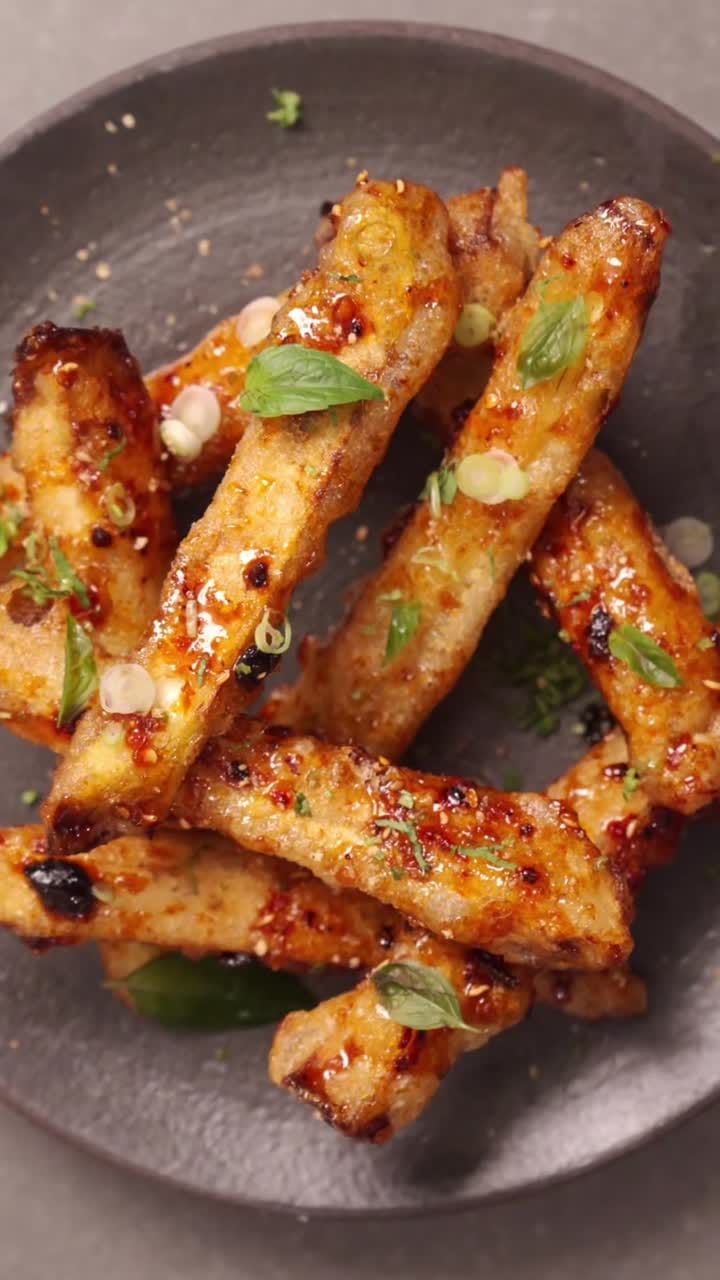
Crispy Eggplant with Sichuan-Style Glaze – 50-Minute Recipe
A bold, spicy, and satisfying dish that pairs crispy, steam‑cooked eggplant with a glossy Sichuan‑style glaze. The combination of sweet, numbing, and tangy flavors makes it a standout appetizer or side for any dinner.
Recipe by Chef Victor Leong (Li Ho Fuk)· Structured by ReelsMeals
From: TikTok(view original)
Rate this recipe
Save this recipe to your cookbook
Free, no account needed. Keep the source and find it again without searching the feed.
Watch the recipe video
Video plays from the original creator's platform. View the original video
Prep Time
Cook Time
Servings
No amounts for 16 of these ingredients
The original didn't state them, so this card doesn't guess. Check the original for the creator's full recipe before you shop.
Ingredients
- 1 whole eggplant
- white sesame seeds
- green onions
- basileaves
- green powder garnish
Batter
- xanthan gum
- tapioca starch
- rice flour
Sauce
- sugar
- Sichuan peppercorns
- red chilies
- chili oil or chili paste
- soy sauce
- black vinegar
- red vinegar
- doubanjiang
- chili flakes
Instructions
- 1Peel the skin off the whole eggplant.
- 2Cut the peeled eggplant into thick rectangular (batonnet‑style) strips.
- 3Prepare the batter by mixing xanthan gum, tapioca starch, and rice flour with enough water to form a thick, smooth coating.
- 4Coat the eggplant strips in the batter and let them rest for a few minutes.
- 5Heat oil in a deep pan to about 356°F (350°F).
- 6Deep‑fry the battered strips until golden and crisp, about 3–4 minutes per side.
- 7Remove the fried strips and drain them on a wire rack.
- 8In a saucepan, combine sugar, Sichuan peppercorns, chopped red chilies, chili oil or paste, soy sauce, black vinegar, red vinegar, doubanjiang, and chili flakes; bring to a simmer and let the sauce thicken, about 5 minutes, stirring until it bubbles vigorously.
- 9Toss the fried eggplant strips in the simmering sauce until they are evenly coated.
- 10Plate the glazed eggplant on a dark grey ceramic plate.
- 11Garnish with chopped green onions, fresh basil leaves, white sesame seeds, red chili flakes, and a dusting of green powder garnish.
Helpful tips while cooking
AI-assisted notes grounded in this recipe's ingredients, timings, and method—not additional creator instructions.
Rest the battered strips
After coating the eggplant strips in batter, let them rest for a few minutes before frying.
Drain on a wire rack
Place the fried strips on a wire rack to drain excess oil and retain crispness.
Simmer sauce until vigorous bubbles
Combine sauce ingredients and simmer, stirring until the mixture thickens and bubbles vigorously, about 5 minutes.
One recipe link, ready for anywhere
Use it in Instagram, TikTok, YouTube, email, or a creator bio. It always opens this recipe and keeps the original source attached.
Publishing this recipe elsewhere? Add a visible credit link back to this page.
Publisher & backlink kit+
Give publishers a useful, properly credited asset. Backlinks only happen when another site chooses to publish and credit it.
Download the card, upload it to Google Lens, then use the outreach message for relevant uncredited copies. Contact only sites that actually reuse the asset.
About this saved recipe
Source-aware card
ReelsMeals turns tiktok.com into a kitchen-friendly checklist while keeping the original source attached.
Cooking context
50 min estimated total time for 4 servings.
Explore related saves
Made this recipe?
Tap a star to rate it — ratings help other cooks decide what to make next.
Rate this recipe
This recipe card was structured automatically from the original source. Always check the source for allergens or details the extraction may have missed.
Frequently asked questions
- How long does it take to make Crispy Eggplant with Sichuan-Style Glaze?
- About 50 minutes in total: 30 minutes of prep and 20 minutes of cooking.
- How many servings does this Crispy Eggplant with Sichuan-Style Glaze recipe make?
- This recipe makes 4 servings as written; ingredient quantities on this page can be scaled.
- Where does this Crispy Eggplant with Sichuan-Style Glaze recipe come from?
- It was shared by Chef Victor Leong (Li Ho Fuk) on tiktok.com. ReelsMeals structured the original post into this step-by-step card; the original is linked above.