No-Bake Raspberry Cheesecake Recipe
A luscious, no‑bake raspberry cheesecake that pairs a buttery shortbread crust with a silky white‑chocolate cream cheese filling, all crowned with juicy fresh raspberries. The dessert is quick to assemble yet delivers a rich, fruity flavor perfect for any occasion.
Recipe by kitchen_diaries_by_zubda· Structured by ReelsMeals
From: TikTok(view original)
Rate this recipe
Save this recipe to your cookbook
Free, no account needed. Keep the source and find it again without searching the feed.
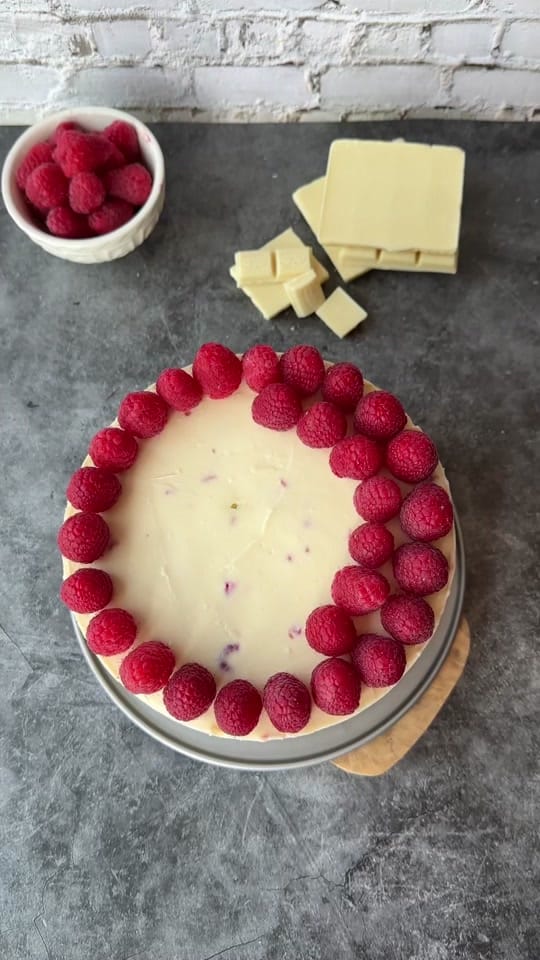
Watch the recipe video
Video plays from the original creator's platform. View the original video
Prep Time
Cook Time
Servings
Ingredients
No main ingredients listed.
Base
- 8 4/5 oz shortbread biscuits
- 2 4/5 oz unsalted butter
Cheesecake Filling
- 1 1/10 lb full fat cream cheese
- 3 1/2 oz icing sugar
- 1 1/2 cups double cream
- 8 4/5 oz white chocolate
- 8 4/5 oz fresh raspberries
- 1 1/10 lb fresh raspberries
Decoration
- 1 1/10 lb fresh raspberries
Instructions
- 1Crush the shortbread biscuits in a food processor until fine crumbs form, or place them in a zip‑lock bag and crush with a rolling pin.
- 2Add the melted butter to the crumbs and pulse a few times until the mixture is evenly combined, or stir in a bowl.
- 3Press the biscuit mixture firmly into the bottom of an 8‑inch deep springform tin to create an even layer.
- 4In a stand mixer or large bowl, whisk the softened cream cheese and sifted icing sugar until smooth.
- 5Pour in the whipped double cream and whisk until the mixture thickens.
- 6Melt the white chocolate over a simmering water bath or in the microwave in 15‑second bursts, stirring until fully melted; let it cool slightly.
- 7Fold the cooled chocolate, 250 g fresh raspberries for the filling, and the remaining raspberries gently into the cream cheese mixture with a spatula.
- 8Spread the cheesecake filling over the biscuit base, smoothing the surface.
- 9Refrigerate for at least 5–6 hours, preferably overnight, until set.
- 10Before serving, run a knife around the edges of the springform tin and carefully remove the cheesecake.
- 11Top with the remaining fresh raspberries as desired.
Helpful tips while cooking
AI-assisted notes grounded in this recipe's ingredients, timings, and method—not additional creator instructions.
Press crust firmly
Press the biscuit‑butter mixture firmly into the springform tin before adding the filling.
Cool melted chocolate slightly
Allow the melted white chocolate to cool slightly before folding it into the cream cheese mixture.
Chill adequately
Refrigerate the assembled cheesecake for at least 5–6 hours, preferably overnight, until set.
One recipe link, ready for anywhere
Use it in Instagram, TikTok, YouTube, email, or a creator bio. It always opens this recipe and keeps the original source attached.
Publishing this recipe elsewhere? Add a visible credit link back to this page.
Publisher & backlink kit+
Give publishers a useful, properly credited asset. Backlinks only happen when another site chooses to publish and credit it.
Download the card, upload it to Google Lens, then use the outreach message for relevant uncredited copies. Contact only sites that actually reuse the asset.
About this saved recipe
Source-aware card
ReelsMeals turns tiktok.com into a kitchen-friendly checklist while keeping the original source attached.
Cooking context
20 min estimated total time for 8 servings.
Explore related saves
Made this recipe?
Tap a star to rate it — ratings help other cooks decide what to make next.
Rate this recipe
This recipe card was structured automatically from the original source. Always check the source for allergens or details the extraction may have missed.
Frequently asked questions
- How many servings does this No-Bake Raspberry Cheesecake recipe make?
- This recipe makes 8 servings as written; ingredient quantities on this page can be scaled.
- Where does this No-Bake Raspberry Cheesecake recipe come from?
- It was shared by kitchen_diaries_by_zubda on tiktok.com. ReelsMeals structured the original post into this step-by-step card; the original is linked above.