Wall Organizer
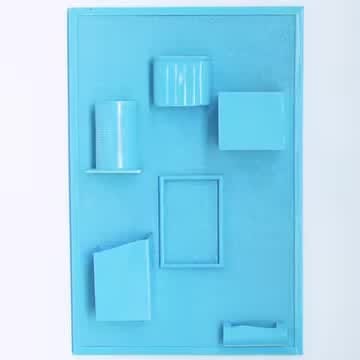
Create a functional wall organizer from recycled materials with a simple glue-and-paint process. The light‑blue finish gives it a fresh, eco‑friendly look, while the cardboard pieces hold notes, keys, or small items. Perfect for a tidy, personalized space.
Recipe by Tasty Home· Structured by ReelsMeals
From: Facebook(view original)
Rate this recipe
Save this recipe to your cookbook
Free, no account needed. Keep the source and find it again without searching the feed.
Watch the recipe video
Video plays from the original creator's platform. View the original video
Prep Time
Cook Time
Servings
Ingredients
- Stronglue
Instructions
- 1Applying adhesive to a cardboard component
- 2Attaching cardboard component to corkboard
- 3Spray paint the assembled organizer components light blue
- 4The organizer components are fully coated in light blue paint
One recipe link, ready for anywhere
Use it in Instagram, TikTok, YouTube, email, or a creator bio. It always opens this recipe and keeps the original source attached.
Publishing this recipe elsewhere? Add a visible credit link back to this page.
Publisher & backlink kit+
Give publishers a useful, properly credited asset. Backlinks only happen when another site chooses to publish and credit it.
Download the card, upload it to Google Lens, then use the outreach message for relevant uncredited copies. Contact only sites that actually reuse the asset.
About this saved recipe
Made this recipe?
Tap a star to rate it — ratings help other cooks decide what to make next.
Rate this recipe
This recipe card was structured automatically from the original source. Always check the source for allergens or details the extraction may have missed.
Frequently asked questions
- How many servings does this Wall Organizer recipe make?
- This recipe makes 1 serving as written; ingredient quantities on this page can be scaled.
- Where does this Wall Organizer recipe come from?
- It was shared by Tasty Home on facebook.com. ReelsMeals structured the original post into this step-by-step card; the original is linked above.